Discord Setup
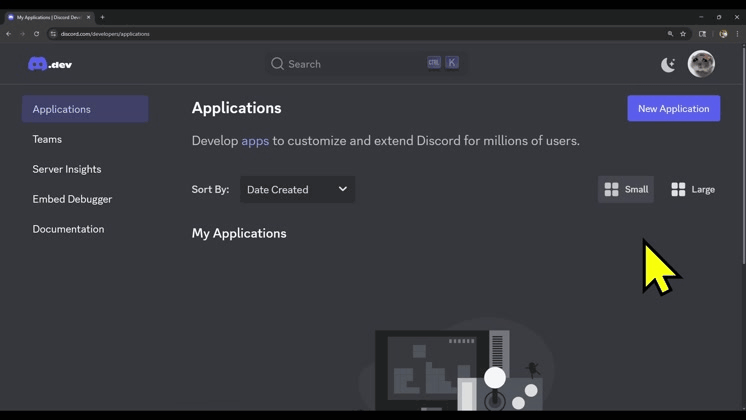
1. Open the Discord Developer Portal
Click “New Application” in the top right corner.
2. Create Your Application
Give your bot a name.
Tip: Be nice - this will show as the username in Discord! (but you can change it later)
Select “Personal” for your team. (This bot is for personal use ONLY)
Click Create.
✨ Eyyyoooo - You now have a bot account. Let’s configure it.
3. General Information
In the left-hand menu, click “General Settings”
Add your App Icon
This is what shows under your application, you can change the profile photo/banner under “Bot”.
What you put in “description” will show in your bots “About Me” section.
4. Enable Required Privileged Intents
Still under the Bot tab, scroll to the “Privileged Gateway Intents” section.
Turn ON:
✅ MESSAGE CONTENT INTENT – lets Aurora read user messages and respond
✅ SERVER MEMBERS INTENT – needed for role mapping and permissions
⚠️ If you skip this, Aurora won't be able to respond or detect roles correctly.
5. Get Your Bot Token
Your token is what Aurora uses to log in. It's like a password—keep it private!
Under the Bot tab, click Reset Token
Confirm and copy the token
Paste it into your
.envfile like this:
envCopyEdit
DISCORD_TOKEN=your_token_here
✅ Save this file but never commit it to GitHub or share it.
6. Invite Your Bot to Your Server
Go to the OAuth2 > URL Generator in the left menu.
Check the following:
Scopes:
botapplications.commands
Bot Permissions:
Send MessagesRead Message HistoryUse Slash Commands(Optional)
Manage Rolesif Aurora will assign roles
Scroll down and copy the generated URL.
Paste it in your browser, and select your server to invite Aurora.
💡 Quick Recap
Created a Discord bot app
Enabled required intents
Secured your bot token
Invited the bot to your server
NOW WHAT
🧪 Test It
If you invite the bot successfully, you’ll see it in your server listed as Offline—that’s perfect. It’ll go online once you run the code.
🎨 Optional Next Step
Want to customize your bot’s avatar?
Go to the General Information tab
Click the bot icon
Upload a profile image (PNG, square format recommended)